GRPOCHE
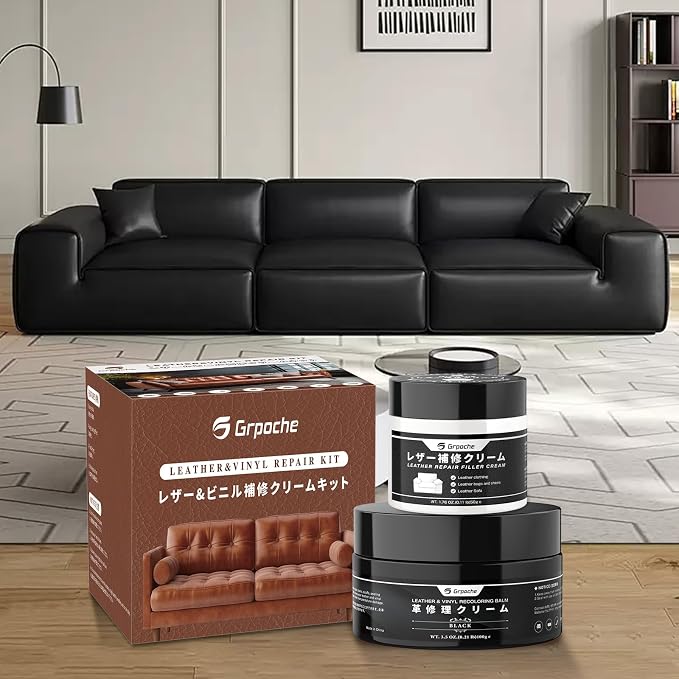
Leather Recoloring Balm Black, Mink Oil Leather Conditioner & Leather Filler Cream, Leather Repair Kit for Furniture,Vinyl Repair Kit Restore Couches, Car Seats, Purse, Scratch, Peeling, Burn Holes
Couldn't load pickup availability
About This
- 【Fully Functional】The most complete leather repair kit includes: 3.5oz Black Recoloring Balm,1.76oz Leather Conditioning Mink Oil, 1.76oz Leather Repair Cream, 2 Brushes, 1 Sponge, 1 Scraper, 1 Polishing Cloth and a pair of Gloves. This is the perfect suit for most people's leather repair needs.
- 【Professional Effects】Leather filler can deal with leather stains, wearing, peeling, scratches and burn hole. After completely drying, use black leather coloring balm for coloring. Our Leather Recoloring Balm make fast, easy DIY repairs, dries quickly and waterproof. Simple operation can eliminate scratches, fading, general wear and burn holes.Mink Oil Leather Conditioner can restore the surface luster of leather, preserve moisture moisturize, prolong the life and protect leather surfaces.
- 【Widely Use】This leather repair kit can be used for a wide range of home, car, office or other occasions of leather products such as genuine leather or synthetic car interior, car seat, steering wheel, purse, shoes, belt, peeling leather chair, wallet, furniture and so on.To make your new or old genuine leather, faux, imitation or premium upholstery as good as new.
- 【Easy to Use】First clean the damaged area, use a scraper to scoop out the leather repair fill and apply it evenly to the damaged area, wait for it to air dry or blow dry and repeat the above steps 2-3 times, then use the leather recoloring balm to restore the color, and finally wipe it with a sponge dipped in mink oil.
- 【Warm Tips】Due to different lighting, screen display or the base color of the leather itself, the color may be different from what you expect. If the leather is lighter in color, you can apply the leather paint multiple times, leaving 10-20 minutes between each layer to dry naturally, until you reach a color depth you are satisfied with. You can try mixing the repair paste with a small amount of other colored leather dye to adjust the tone to better suit your needs.
Share

Explore Our Collections
-
Caulking Tool
Whether you're sealing a bathroom, fixing window gaps, or finishing tile edges, having...
-
Sealant Remover Tool
Old, peeling sealant is more than an eyesore — it's an open...
-
Gap Repair
Even the smallest gap around your home can let in moisture, drafts,...
-
WATERPROOF
Water damage is one of the most expensive problems a homeowner can...
-
BATHROOM & KITCHEN
The bathroom and kitchen are the two hardest-working rooms in your home...
-
Leather Repair
Scratches, cracks, peeling surfaces, and worn edges can make leather furniture, car...
Customer Review
-
Daniel Brooks
⭐⭐⭐⭐⭐
"Saved me from an expensive plumbing repair"
I discovered a small leak under my kitchen sink late at night.
This repair tape was incredibly easy to apply and stopped the leak immediately.
It held securely until I could arrange a permanent repair.
A must-have item for every homeowner. -
Sophia Mitchell
⭐️⭐️⭐️⭐️⭐️
"Quick fix that actually works"
I used this waterproof repair tape on an outdoor water pipe.
The application took only a few minutes and the seal has remained strong through several rainstorms.
It's durable, reliable, and much easier than I expected.
I'm very impressed with the results. -
Ryan Cooper
⭐️⭐️⭐️⭐️⭐️
"Perfect for emergency repairs"
A pipe in my garage started leaking unexpectedly.
This tape gave me a fast temporary solution without needing special tools.
The adhesion is strong and the material feels high quality.
Definitely worth keeping in a home repair kit. -
Emma Sullivan
⭐⭐⭐⭐⭐
"Every DIY homeowner should have this"
I purchased this for emergency household repairs and it exceeded my expectations.
It sealed a leaking connection quickly and helped prevent further water damage.
The instructions were simple and the product worked exactly as advertised.
I'll be ordering another roll just to keep on hand.
Blogs
View all-
How to Caulk Around a Kitchen Sink Like a Profe...
Kitchen sink caulking is essential for preventing water leaks, mold, and long-term moisture damage. A clean, well-sealed sink also gives your kitchen a polished, professional appearance while extending the life...
How to Caulk Around a Kitchen Sink Like a Profe...
Kitchen sink caulking is essential for preventing water leaks, mold, and long-term moisture damage. A clean, well-sealed sink also gives your kitchen a polished, professional appearance while extending the life...
-
How to Remove Old Silicone Caulk Without Damagi...
How to Remove Old Silicone Caulk Without Damaging Tile Old silicone caulk can crack, discolor, or develop mold over time, reducing its waterproof performance. Replacing it early helps protect tiled...
How to Remove Old Silicone Caulk Without Damagi...
How to Remove Old Silicone Caulk Without Damaging Tile Old silicone caulk can crack, discolor, or develop mold over time, reducing its waterproof performance. Replacing it early helps protect tiled...
-
Leather Repair Made Simple: A Complete Guide to...
Leather Repair Made Easy Leather furniture, car seats, bags, and jackets can often be restored instead of replaced. Common issues like cracks, tears, fading, and peeling can be repaired at...
Leather Repair Made Simple: A Complete Guide to...
Leather Repair Made Easy Leather furniture, car seats, bags, and jackets can often be restored instead of replaced. Common issues like cracks, tears, fading, and peeling can be repaired at...
-
How to Remove Mold Around Bathroom Caulk Before...
Mold around bathroom caulk is often a sign that aging Caulking, Silicone, or Sealant has trapped moisture beneath the surface. Simply covering mold with new caulk rarely solves the problem....
How to Remove Mold Around Bathroom Caulk Before...
Mold around bathroom caulk is often a sign that aging Caulking, Silicone, or Sealant has trapped moisture beneath the surface. Simply covering mold with new caulk rarely solves the problem....